A body of revolution
In this lesson we will introduce a new way to create objects - the so-called bodies of revolution, let's start with a stack of familiar objects and modifiers of a new type of object - spline.
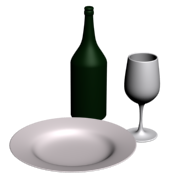
So, what is a body of revolution? If you believe Wikipedia, the rotation of the body - the bulk of the body that occur during the rotation of a plane figure bounded by a curve about an axis lying in the same plane. That is, as an example of such objects can be reduced as a sphere, cone, cylinder, etc. All these figures have been among the standard objects, but to the bodies of revolution are also more complex objects such as dishes, bottles, mugs, cups, glasses, etc. Here are just some of the sites we have today and we'll do. Let's start with probably easier to model a bottle.
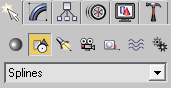
Run 3d Max, if it is already running then create a new scene. In the tab «Create»
Select the item «Shapes»
In the drop-down list, select «Splines» (Splines)
In the work area should go to one of the types of projections, for example in the form on the left, there is much more convenient to work with splines. Actually that is a spline? This concept is rather complicated for a simple definition of a person, but it is a simple line that passes through the control points and slowly (or not so gently) their skirts.
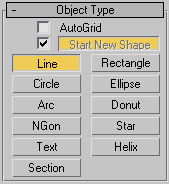
Continue. Select the object «Line»
And try to portray in the context of a bottle, not the whole bottle and only half of it. Vryatli is you get it right the first time, especially without a blueprint (the use of drawings to model discussed in the next lessons), so a rough sketch contour bottle, which you can then edit.
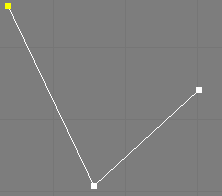
When you create a smooth line can be adjusted, so if you press the left mouse button (set breakpoint) and then let her go you get a broken line:
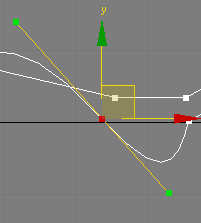
If you put a full stop (by pressing the left mouse button) and do not release the mouse button then dragging the cursor across the screen you can adjust the smoothness of the line at the site of the previous point to the new point (in the figure shows a red arrow):

When you release the left mouse button adjustable smooth tench in the area from the point to set up the next point (in the figure shows a red arrow):

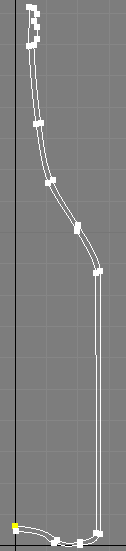
For simplicity, when you create a circuit I have used only the broken lines. I got something like this:
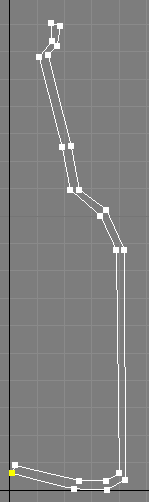
Please note that this is a spline, rather than several different splines arranged one after another. Also important is the fact that the spline has a break and a break down on the bottom of the bottle.
Now we give our smooth contour to the contour of the isolate was created (if the selection was filmed) and go to the «Modify»
Here, take a look at this list here:
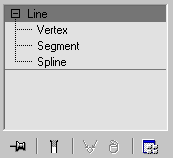
By selecting individual items in this list, you can edit the relevant parts of the spline. By selecting the root of this list, ie the inscription «Line» we will get access to the entire object entirely, choosing «Vertex», you can edit the vertices (control points), spline, ie, move them, change their type, etc. «Segment» - responsible for working with spline segments (segments between the vertices) "Spline" - allows you to change the whole part of the spline is not related to the other side.
These tabs are duplicated below in the book «Selection»:
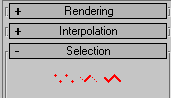
We need to edit the spline so that the top tab select «Vertex», is now using the tool «Select and Move»
You can drag any vertex to the right place. If you press the right mouse button on one of the peaks will open a context menu where you can change the node type:

The following types:
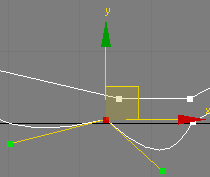
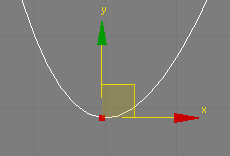
Bezier Corner - vertex is independent of each other's shoulders force (yellow sticks), which can be changed by adjusting the spline areas before and after the peaks:
Bezier Corner - vertex is independent of each other's shoulders force (yellow sticks), which can be changed by adjusting the spline areas before and after the peaks:
Bezier - just like the previous type has two arms but mutually dependent, so moving one shoulder and the other moves, so that together they form a straight line:
Corner - a simple polygon vertex not smooth contours:

Smooth - a smooth adjustment does not bypass the top:
Now, moving the top, changing the type and adjusting the smoothness of the stroke, try to make a contour bottle is more correct and smooth. In this case you may need to insert extra vertices, where more detail is required, this is a button "Insert" in the book "Geometry":
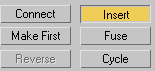
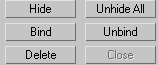
By clicking on it you can insert a vertex in the right place at the spline by clicking the left mouse button.Remove extra vertices by pressing the button "Delete" key on your keyboard or buttons, too, "Delete" in the book "Geometry":
When you remove the spline is not broken.
Try not to get involved in the number of vertices less than you correctly describe the contours of the bottle, the better. Lastly, we should mention about how to select a group of vertices, this vertex can be selected by holding "Ctrl" key on your keyboard, or circling the top of the rectangular frame required (hold the left mouse button). You can combine these two ways, by holding "Ctrl" to trace the desired peak. Sometimes the way is not possible to allocate the required top, remove them from the selection by clicking on them you can left-click button while holding preliminary "Alt" key on your keyboard.
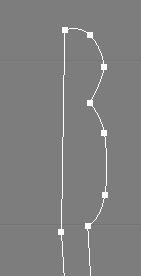
So, moving the top, adjusting the smoothness of contours, adding in the right places extra vertices, I get the following outline:
The hardest place is probably the bottleneck, so here it separately:
If there will be problems, perhaps it makes sense to look at this bottle well, or on the picture with the bottle.
Now it's time zavraschat our path and get a bottle for this search Modify tab in the stack modifiers (Modifier List):
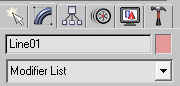
It contains a list of possible modifiers (filters) that can be applied to the object it there very much, and frankly, many I do not know why we need, but we are concerned with the modifier «Lathe», it is in the section «OBJECT SPACE-MODIFIE»
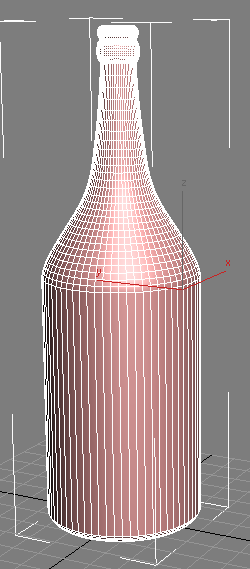
That's turned out a bottle, but it may not be much distorted by:
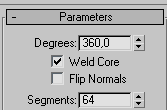
To do this, select the direction of the rotation axis and its location, it is done in the book «Parameters», in the sections «Direction» and «Align»:
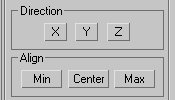
I was a rotation axis and the Y button is «Min» section «Align», you may have other options, depends on to what you were doing the projection path, and looks like a path.
Just after the required parameters prostanovki bottle can get the desired shape, but it looks like a black spot:
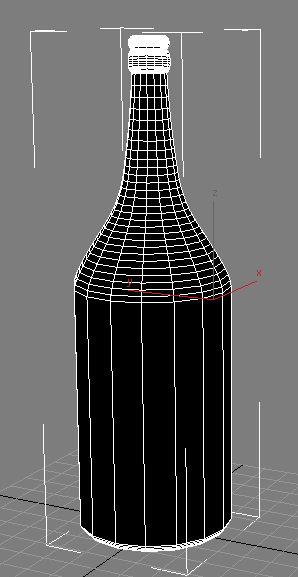
This is due to the fact that normal ranges are deployed inside the bottle and not outside, so the lighting is calculated is not true. To fix this, we must put a checkbox on the «Flip Normals»:
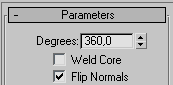
Now we finally have a normal bottle, just need to increase the segmentation of the circle to make a smoother:
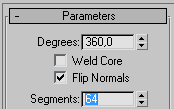
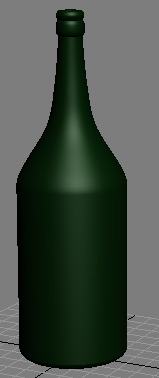
The result is a bottle:
Its transparency be discussed in later lessons, but in the meantime, you can assign the appropriate color:
I think you understand how to create objects of rotation, try to fix a plate:
.jpg)
It's possible such a shoal in the center of the dish:
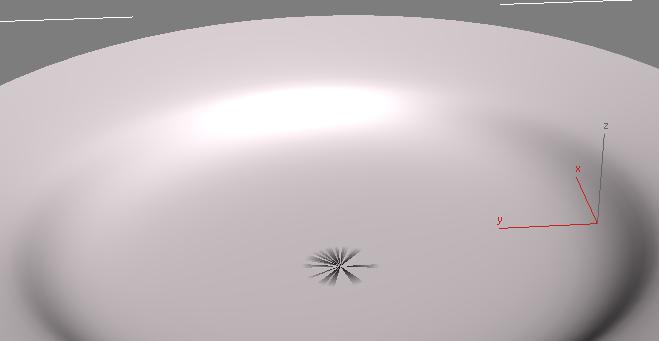
This can be corrected by placing a checkbox in the «Weld Core»:
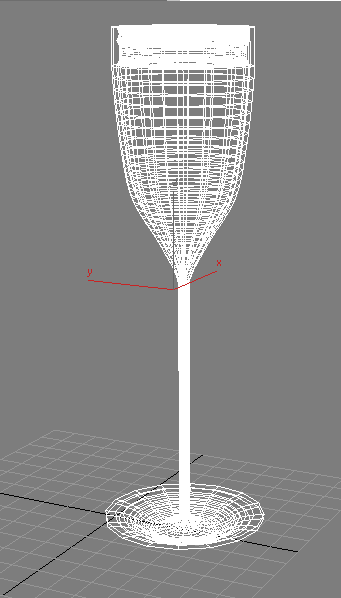
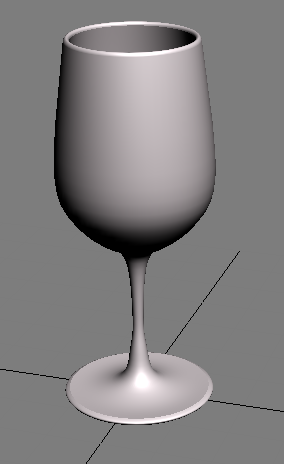
Just try to make a glass:
That's all.
No comments:
Post a Comment